This post may contain affiliate links. Please see our full Disclosure Policy for details.
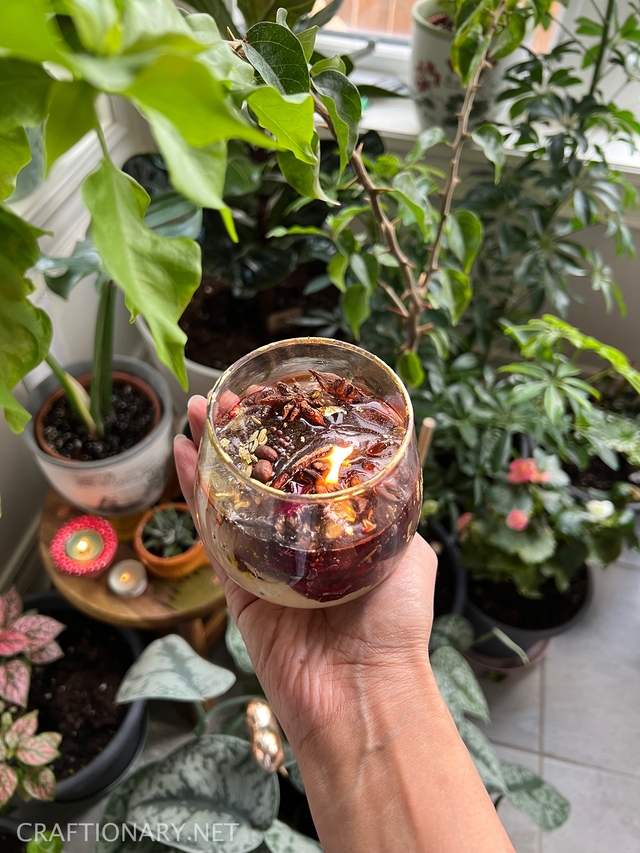
Learn to make a clear gel candle with material and instructions that are easy to follow for a beginner. Use cinnamon, herbs, chai spices and even dried flowers to fill the candle and add color and fragrance for interest.
Make gel candle
Making a gel candle is as easy as melting gel candle wax and pouring into a jar with candle wick. However, to make any candle decorative there are many fun and creative ways. I shared a tutorial to make easy gel wax candle that you all love. Today, I am using the technique to make candle decoration with natural ingredients. You can easy find spices like cinnamon sticks, star anise, cardamon, vanilla, pumpkin spice, dried fruits like apple and oranges in your kitchen. Some herbs and dried flowers make beautiful additions as well.
Material:
- Candle gel
- Jar – it can be a recyclable mason jar, bowl, or a pretty container of your choice. Transparent or glass jar is recommended so you can see the beauty.
- Candle wick
- Glue gun
- Double boiler or a melting pot – you can also use two stainless steel pots with one slightly larger than the other.
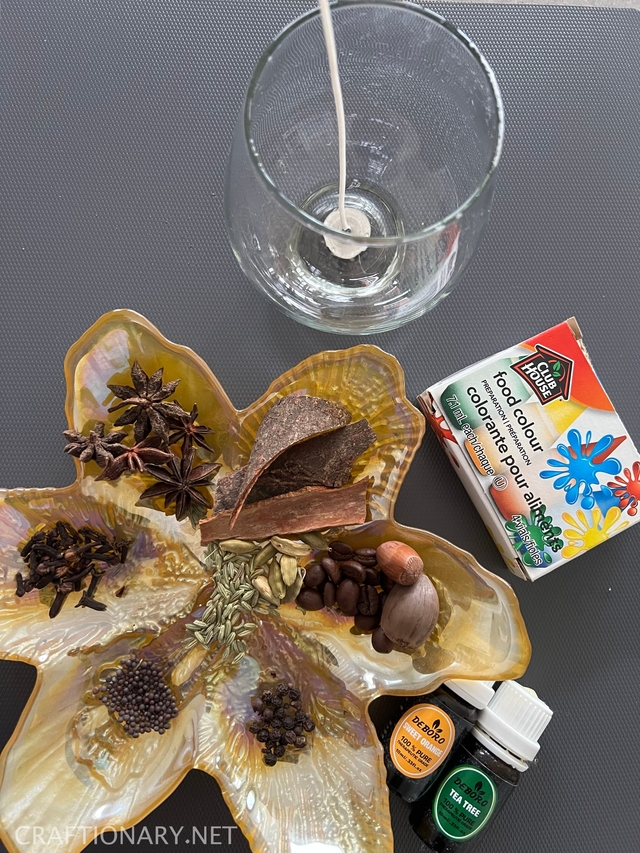
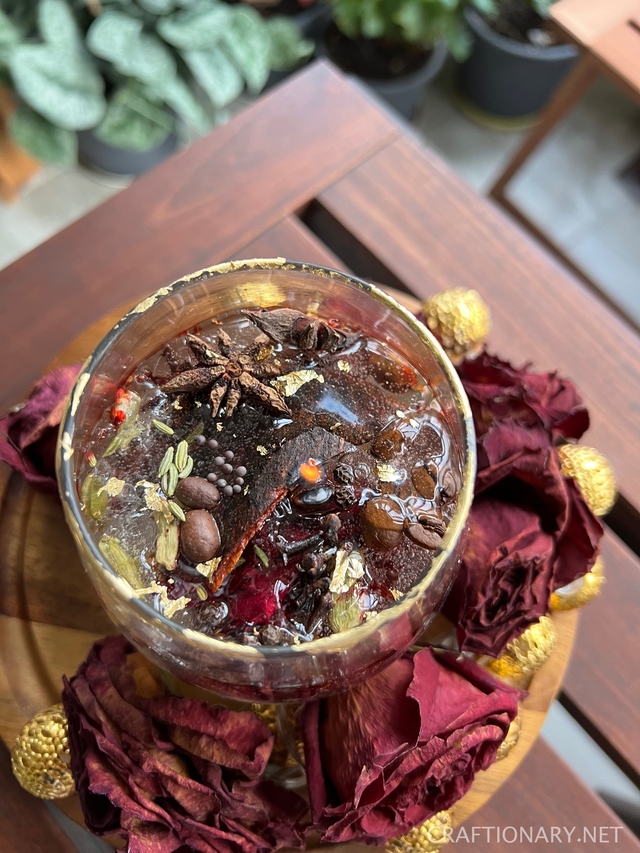
- Dried ingredients – fennel, star anise, cardamom, pepper, poppy seeds, cloves, coffee beans, cinnamon sticks, dried flowers.
- Food coloring – I am aiming to use things I can find at home. However, there are dyes for candle making like dye color chips and oil-based candle dye.
- Essential oil – I am using fragrance oil tea tree and orange.
- Candle making kit for starters – get all in one for beginners.
To decorate candle:
- Gold leaf sheets
- Mod podge
- 2 basic paintbrushes
Video tutorial
Here’s a video with instructions for your convenience if you prefer:
Instructions:
Start by gathering all the ingredients! You will have most of the ingredients for this candle in the kitchen.
Use glue gun to stick candle wick at the base of the jar.
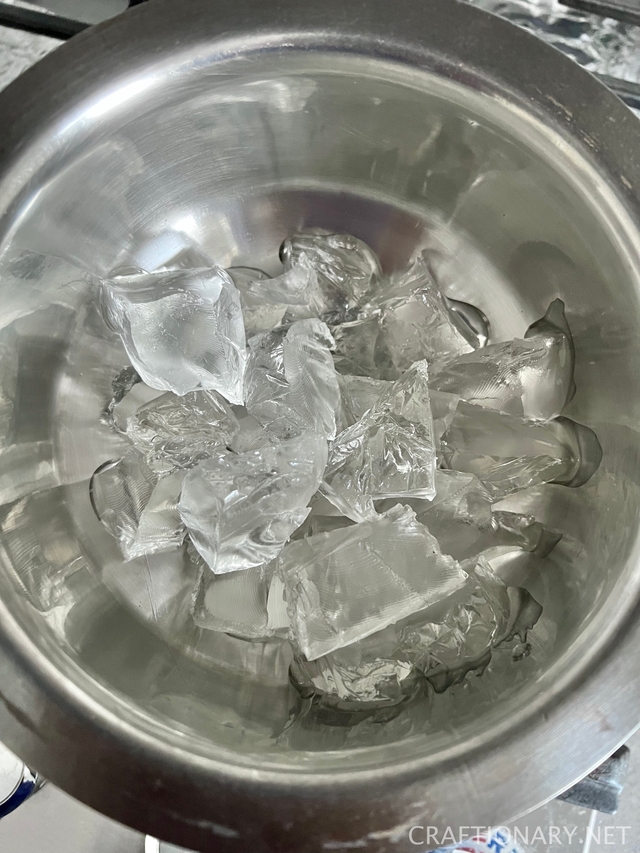
Have fun squeezing the gel, when you are done use a cutting board and knife to cut cubes. Put it in a measuring bowl to measure the quantity.
Tip 1:
You can always check how much is needed by pouring water in your jar and measuring the quantity. For this candle I am using 8 oz of candle gel.
Transfer the gel into a stainless steel pot and put in over a slightly larger stainless steel pot filled with water half way. You can also use a double boiler. Put it on high flame and it will melt in 20-25 minutes.
Tip 2:
Be careful not to use a spatula to mix the gel as this forms bubbles in your clear gel and makes it cloudy. If you want to move it around to assist with melting gel, use silicone gloves to tilt and swirl the pots.
While the gel melts. Get your dry ingredients ready in a plate. Open the caps from food coloring you plan to use and essential oils. You will also need a toothpick handy to move things around.
Tip 3:
Candle gel solidifies very fast so you have to work quickly with it. Therefore, prepping in advance and being ready with how you want to position your ingredients is important.
You can choose to make colorful gel by pouring and mixing food color in the gel while it melts in the pot and use toothpick or a teaspoon to mix the color. But today we will try something fun. We will make patterns with color.
Tip 4:
Allow any gel that sticks to your spatula, pot sizes or falls while pouring to solidify. Pick it up and put it back in pot to melt and use. Gel candle is mess free and fun to make.
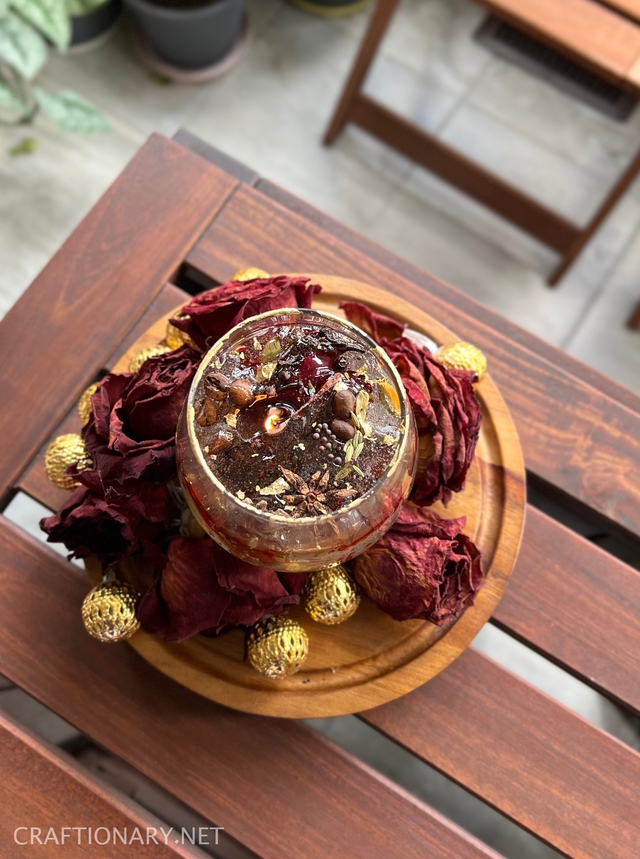
Pour some gel into the base of the jar and quickly stick dried rose, star anise and any ingredients you want at the base of the candle. Push them in to ensure they are immersed from the base so they stick in place.
Move the pot back to heating while you wait for this to settle. The key is to not allow gel to solidify while you are working in intervals.
After 15 minutes, take the rest of the gel and pour into the jar, stop at various intervals to add more ingredients as you like. Put drops of food coloring and use toothpick to swirl by moving it back and forth. Push the toothpick into the gel to make fun patterns and art. Use different colors for fun. Add essential oil.
Experiment with various combinations, color movement and scents. Pour gel as you go to position things in different locations.
Careful considerations:
Keep in mind if you pour all things and gel together everything floats to the top.
Also take precaution not to put dried ingredients too close to the candle wick, it will burn and destroy your candle.
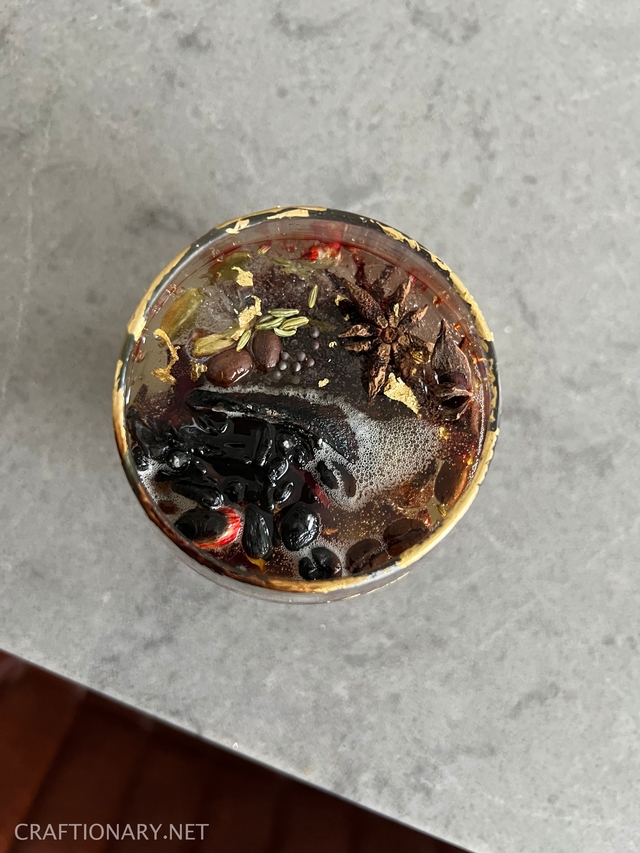
I used a toothpick and while it the gel was runny used it to settle things far from the candlewick.
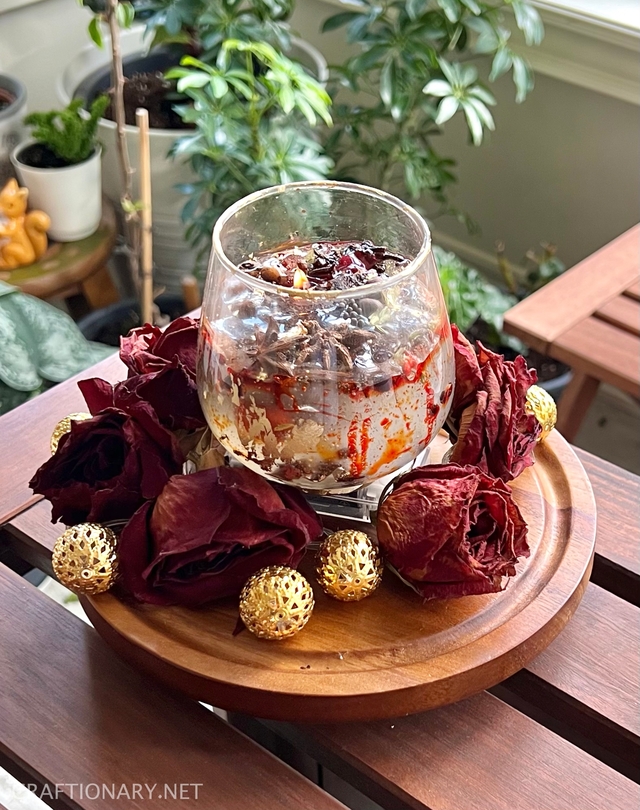
Let the candle settle and cure for 15-20 minutes. We will now use gold leaf to add feature to our candle.
Gilding:
Use a paintbrush to layer the glass with a thin layer of mod podge. Now place the gold leaf sheet on top. Use a dry brush to smooth it on the glass and ensure there is no air between the mod podge and sheet.
Let it dry for 10-15 minutes. Now rub off the excess of gold leaf with a dry brush. You will notice interesting distressed gold leaf details on your candle. Keep the excess gold leaf flakes in a jar for later use. Don’t throw it away.
Some flakes with fall inside the candle and add to the decorative touch.
I used mod podge to seal gold leaf in place but I realized it makes the glass look a little dull. Therefore, I recommend using a clear sealer spray.
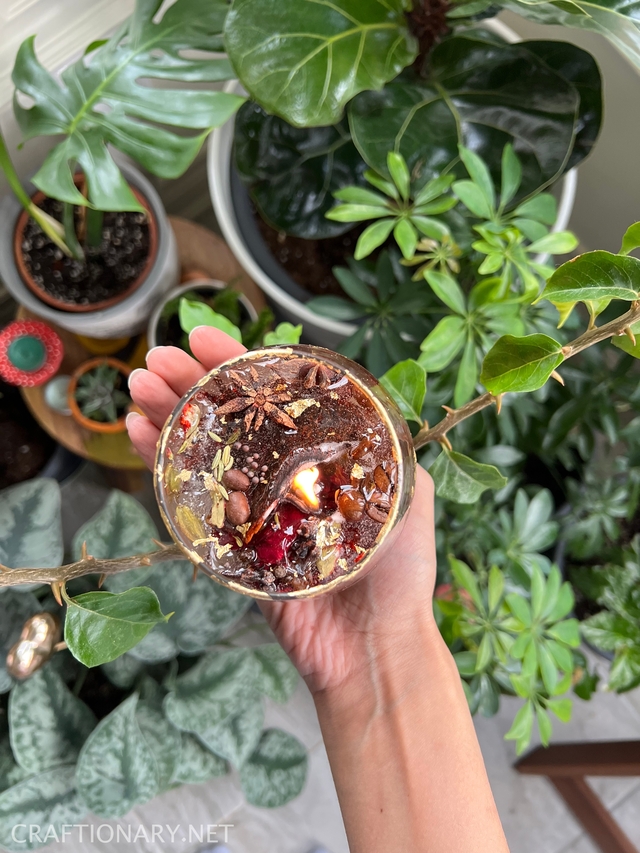
Enjoy your candle. My favorite part is when the candle burns and the gel melts around and at the top of the candle making a clear pool. It looks beautiful.
Tip: Wipe your pots with a dry paper towel to remove the gel residue. Warm the pots empty and wipe any leftovers that are sticky. Now use sponge with soap and water to clean properly.
You will also like: