This post may contain affiliate links. Please see our full Disclosure Policy for details.
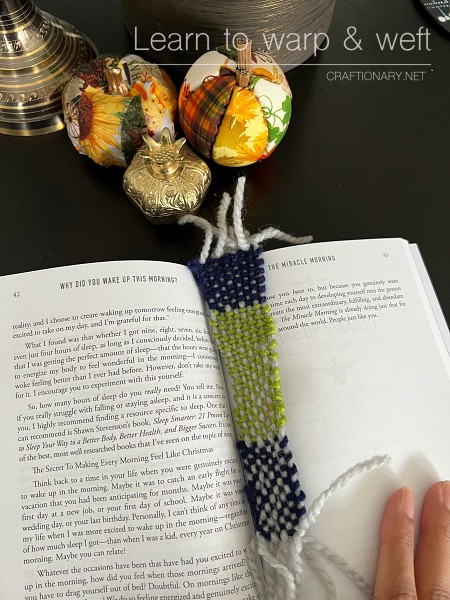
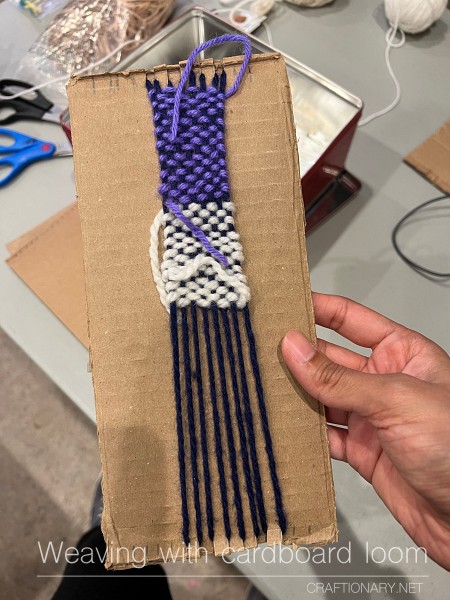
Today I am sharing my experience as a first timer and the instructions and material I found useful to learn to warp and weft using cardboard loom. This project is ideal for beginners and kids alike. I will share easy step by step instructions followed by a video tutorial to assist you. Make a basic warp knitting art, bracelet, friendship band, bookmark or a piece to frame as wall decor with this warp and weft cardboard craft.
You can get a variety of warp and weft machines from stores but they are costly. This method introduces you to the fundamentals without any hefty investments.
Interesting craft – Loom knitting for beginners with toilet paper roll
Learn to warp and weft using cardboard loom
The instructions here will focus on weaving a bookmark using warp and weft method. This craft is great for therapy as well as meditation. Turn on some music and enjoy warp knitting.
In the picture: Make Fabric Styrofoam Pumpkins
Materials for warp and weft
- cardboard loom
- yarn
- needle (knitting needle with large hole for passing yarn)
- sharp scissors
- fork
Weaving terminology used in warp weft
Warp and weft definitions:
Warp thread: Thread that is strung over the loom vertically and holds the tension while you weave.
Weft thread: Thread that is woven between the warp threads, creating patterns and structure in the weave.
Loom: The structure that holds the warp threads under tension to allow for interweaving of weft threads on the warp.
Instructions for basic warp knitting without machine
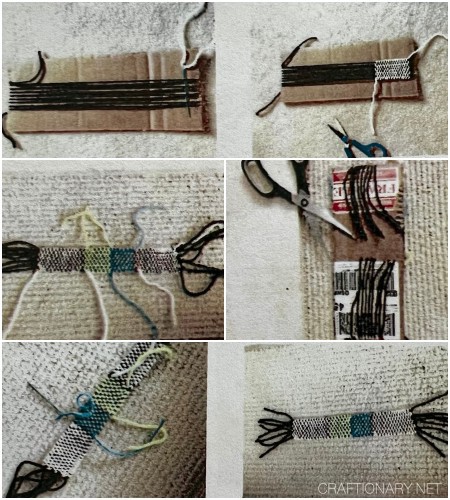
Prepare your cardboard loom
by cutting shallow slits at each end of the cardboard. There are pre-measured marks where you need to cut. Make sure they are equally marked before cutting. Use a ruler or estimate to mark with pencil.

‘Warp’ your loom
by wrapping your wrap thread around the cardboard, placing it so that your thread sits in the cuts at each end of the loom. Remember the warp thread will show through, so chose the color carefully. Darker colors contrast well with lighter colors.
Tuck the ends into the slits at the top of the loom. You will need 8 warp threads to create the bookmark width, so wrap enough times to achieve that number. Wrap fairly tight, but not too tight to bend the cardboard. You should be able to comfortably insert your fingers underneath the threads and lift them up slightly. Try to keep an even tension to all the threads.
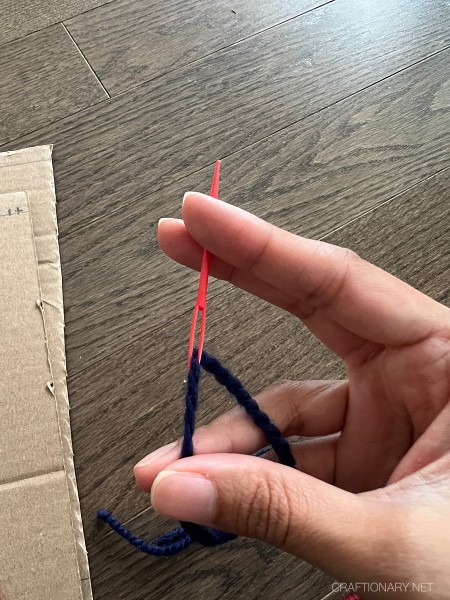
Thread your needle
with weft thread (first color you want to use) and start weaving at the bottom of your loom using an over and under technique, every other one. When you get to the end of a row, turn your thread and go back the other way. Make sure that if you ended under the warp thread, you begin your next row by going over the warp thread.
Use the fork to push down the weaving as you go so it sits tightly together. The prongs go between the warp threads and press the weft down.
Start a new color
by cutting your yarn at the end of a row and threading a new color through. Leave some extra thread to weave in at the end and cut off later. Start the opposite way (either over or under the warp thread) according to your last color.
Continue weaving
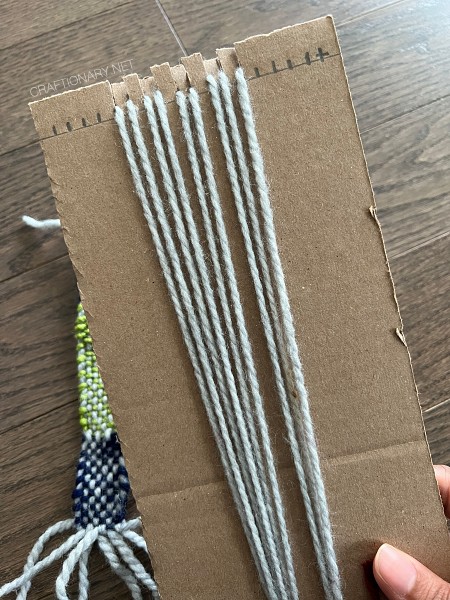
alternating colors as you like and make a pattern. There is no need to tie anything off, just leave your threads loose, they will be woven in at the end. Once you reach the end of your loom or your desired length, turn it over and cut the warp threads down the middle.
Removing two threads
at a time, tie them in a knot at the top. Repeat for both ends. You will now have long warp threads which you can trim to your desired length. You will also have loose weft threads that you will weave in next.
Using your needle, weave the loose ends into the bookmark. Try to hide the thread in the same color section. Cut the loose ends off as close as you can, after you have woven them through a few stitches. Trim the fringe to your designed length.
Your bookmark is complete.
Video tutorial to help with warp and weft
Finally, as promised the video tutorial that helped me warp and weft is from creative bug. This kids weaving instruction is fun for families to do together and classroom settings. You can get free access if you have a library card. This post is not sponsored. However, if you are watching this from else where you can get started into weaving with cardboard loom bookmark tutorial on YouTube instead.
Once you get started there are tons of designs and patterns that you can try but this one is the basic one for starters. Enjoy!
Weaving on a cardboard loom
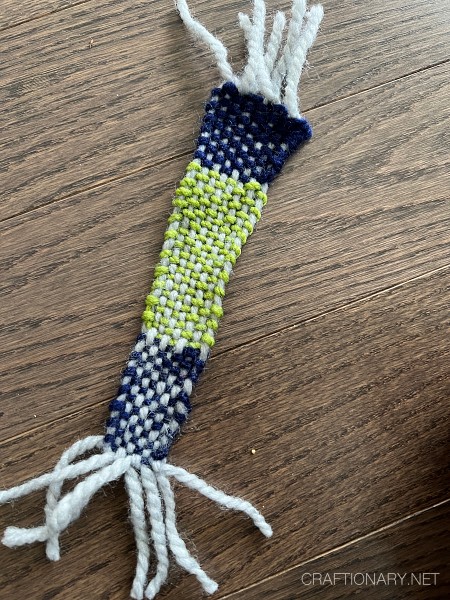
I want to share the bookmark I was able to produce in 30 minutes as a first timer to get you motivated. It is not the prettiest but I like how it turned out using the material that was available at the library. It looks wider in the beginning and then slowly becomes narrower. What I learnt is to be mindful of weaving and pulling tighter at the beginning so that it stays consistent as you continue.
You will also like:
25 New things made with DIY cardboard box