This post may contain affiliate links. Please see our full Disclosure Policy for details.
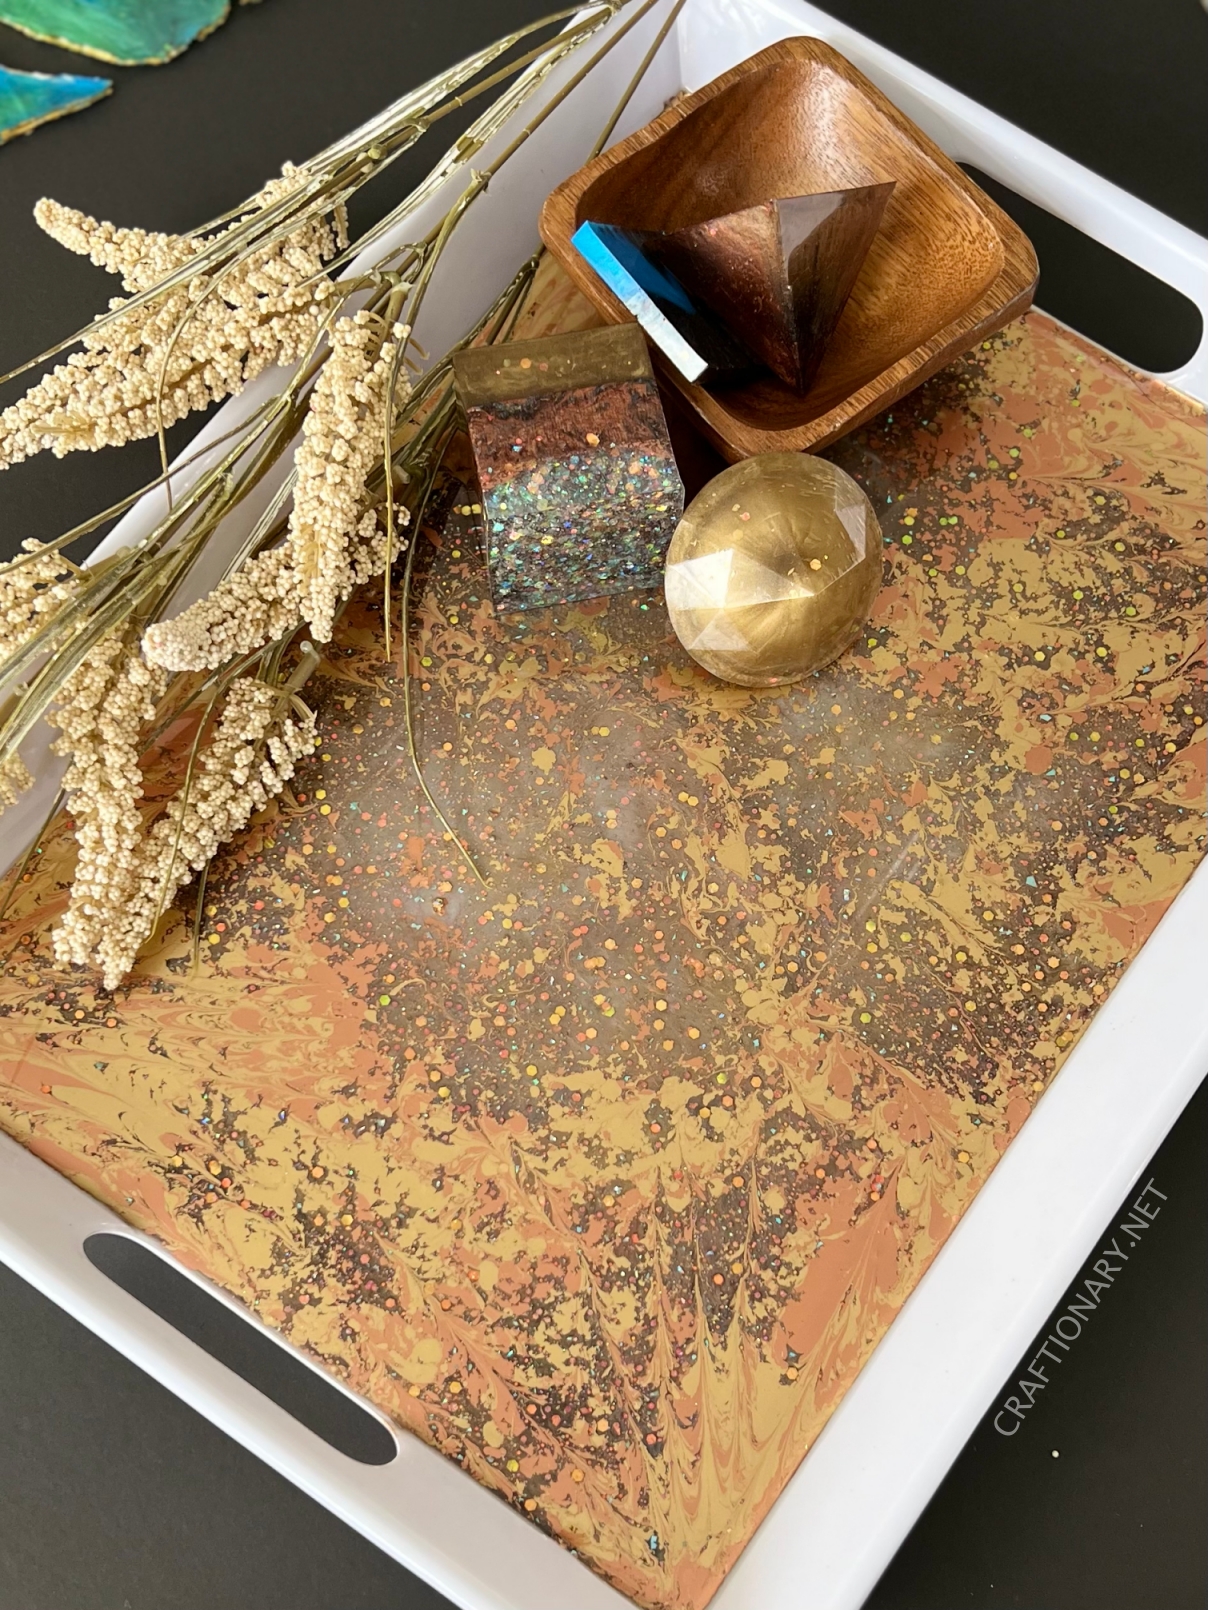
Make custom DIY resin tray for your home or shop for decor, gifts, and serving trays in a variety of different colors and swirls with this simple tutorial.
The best part about making a resin tray is that it stays in the tray unlike other projects where you have to take it out of the mold. It will remind you of your childhood memories where you mixed paint and pour into a shallow dish and see colors mix and make intricate patterns and designs without any effort.
You can choose any tray whether wooden, acrylic or metal. Now choose colors that will work best with the texture and tones of tray base. For the resin to move and make abstract motifs at least choose 2 or 3 resin colors. Once, you are comfortable with the process you can try more colors and fillers as well like pressed flowers and glitter.
DIY Resin Tray for Beginners
Is Resin Tray Safe for Serving Food?
Are you thinking about making a resin tray but not if its food safe! Resin tray is safe for putting food directly or indirectly. This is because most of the resin including Nicpro epoxy resin is non-toxic and FDA certified. This is true when it is accurately measured, mixed properly, and fully cured.
Resin Pour Tray Materials and Supplies
- Tray – I am using a medium plastic tray as a first try. Avoid using bendy low quality trays. You can find a variety of options in different shapes, materials, and sizes. Smaller tray requires less resin than large ones to cover the surface.
- Another option is to get a silicone resin tray mold. Unlike this project where the resin stays in the tray, this option allows you to remove the resin tray from the mold once it cures. You can also make your own silicone molds.
- Resin – This kit includes mixing cups, silicone spatula for mixing, spreader, disposable gloves, plastic tablecloths to protect your work surface. What type of resin to use for tray? You can use any shallow pour resin with high gloss finish clear epoxy for coating the bottom of an existing tray as well as for casting a tray with silicone molds.
- Mica powder – These are metallic pigment powders for epoxy resin. You get a beautiful shiny color by mixing a little into the clear resin or brush it on the surface before pouring clear resin.
- Chunky glitter – These are larger glitter flakes. You can also use the fine, gilding or holographic glitter flakes. Use them by sprinkling in with mica powder or directly mixing into clear resin to pour into the tray. You can also place it like garnish from the top after pouring your layer of resin. Make sure to top with another layer of clear resin to seal it once the resin cures. This step is important for a smooth surface and is called the dooming effect.
- Silicone measuring cups – You can use disposable ones and throw them after use. However, these silicone measuring cups are reusable. Simply peal the leftover resin off once it cures and wash it with water and soap.
- Split cups – Use silicone made split cup with a split to mix different colors and pour resin. Make abstract patterns with contrasting colors.
- Heat gun (optional) – Used to remove air bubbles from resin and move the resin to create patterns by spreading the resin colors.
- Wood skewers – Instead of using the heat gun I used skewer stick to make swirls on the resin tray. The resin bubbles in shallow pour normally pop as they cure leaving a smooth finish. If needed you can use a torch to pop the bubbles.
Instructions for Making Resin Tray
Before making the Resin Pour Tray we must figure out how much resin is required for our project. Since, any leftover resin will cure and get wasted anyways once you mix the hardener, this step is important to avoid wastage.
How to calculate how much resin I need?
This is where the volume of a surface comes into play from our Grade 3 math class. Simply measure the length and width of your tray in inches. Consider an average depth of the resin pour for the height based on your tray style. Now multiply the three numbers (for example length X width X height) to get the cubic inches volume of the surface. Use this inches to ounces convertor to find the quantity of epoxy resin in oz.
Another method is to pour water into the tray and use a measuring cup to empty the water and measure the quantity. It is always better to make a little more than the amount needed as resin sinks. Make sure to dry the tray completely before pouring resin. Resin will be destroyed or sticky cure if it comes in contact with water in anyway.
If you enjoy watching more than reading, here’s a quick video tutorial showing how to make resin tray by pouring and mixing a variety of colors.
Pour and Mix Resin
Cover the working space with tablecloth and place your supplies. Wipe the tray to remove any dust particles. Mix resin and hardener in equal parts in a large measuring cup as per manufacturer’s guide. Stir for at least two minutes in one direction. Let it sit for a minute. Split cup pour resin has tips to avoid bubble formation and sticky resin with simple tricks for best results.
Pour clear resin into smaller measuring cups for each color. I am using three different colors namely black, copper and antique gold. Add mica powder and glitter. Stir till the colorant mixes well and forms the shade you require.
Make Swirls and Patterns in the Resin Pour Tray
Now it’s about having fun. Pour the colors in different directions and let the colors blend in naturally. Here’s what I did. Mix the four colors in a split cup and pour them together letting the natural blend take place.
You can also pour the black on the tray and use spreader to move it to the sides and spread to the edges. Now pour antique gold on the sides followed by copper making the inner circle on the tray. I also added some champagne chunky glitter to clear resin and pour at the center of the tray.
Let the colors settle and then use heat gun to pop any bubbles. Use a skewer to make swirls and patterns by moving it around to mix the colors. Heat gun can also be used to spread and make marble effect by mixing the colors instead of dragging with a skewer to make delicate designs. You can experiment with different techniques to make abstract art.
Also note that resin will move and slide around and make natural patterns as it cures. Let it cure for 24 hours. Now make a solution of clear epoxy resin to seal the tray. Pour on top and let it cure for another 24 hours. Your tray is ready to use after 2 days.
Here’s a before and after pouring resin to make DIY tray.
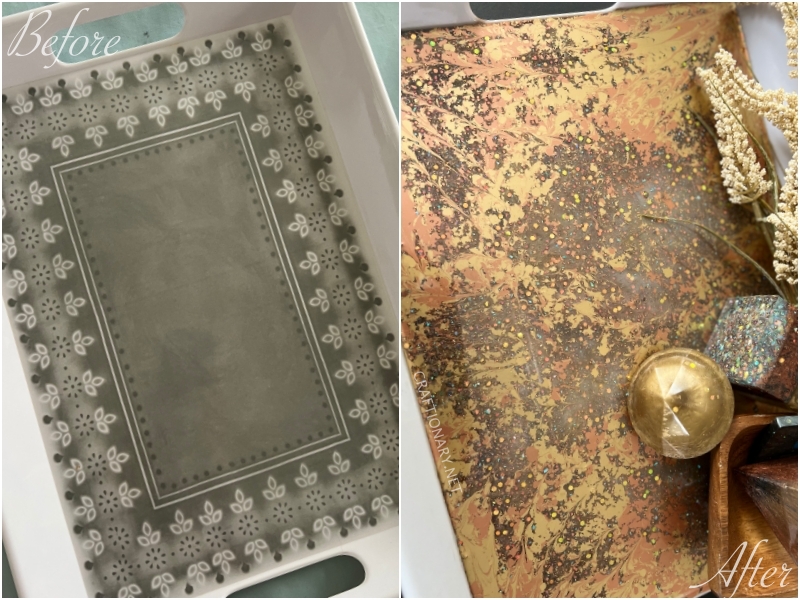
Before and After Resin Tray
Let me know if you have any questions.


This worked great! best instructions I’ve seen yet btw you can get a set of nested wooden trays and make this even easier by puring directly into the trays it looks awesome when you use the same colors on all the trays and each one comes out a little differentiated.
Thank you! That is a great idea to try as well.
Hi ! Is that a plastic tray that you’ve used? If yes, does resin stick to plastic ?
Hi Kinza, yes it’s a plastic tray and it works perfect on it. Have been using it at home and washed it many times still beautiful as first!